Basic Map and Compass Navigation for Backpackers Over 40
NOTE: This article comes from our podcast episode 6: Listen to it HERE
Why Basic Navigation Still Matters in the Age of GPS
Phone apps, GPS watches, satellite messengers, and digital maps are incredible tools. I use them. I like them. I recommend them.
But here is the problem: when technology fails, it can fail completely.
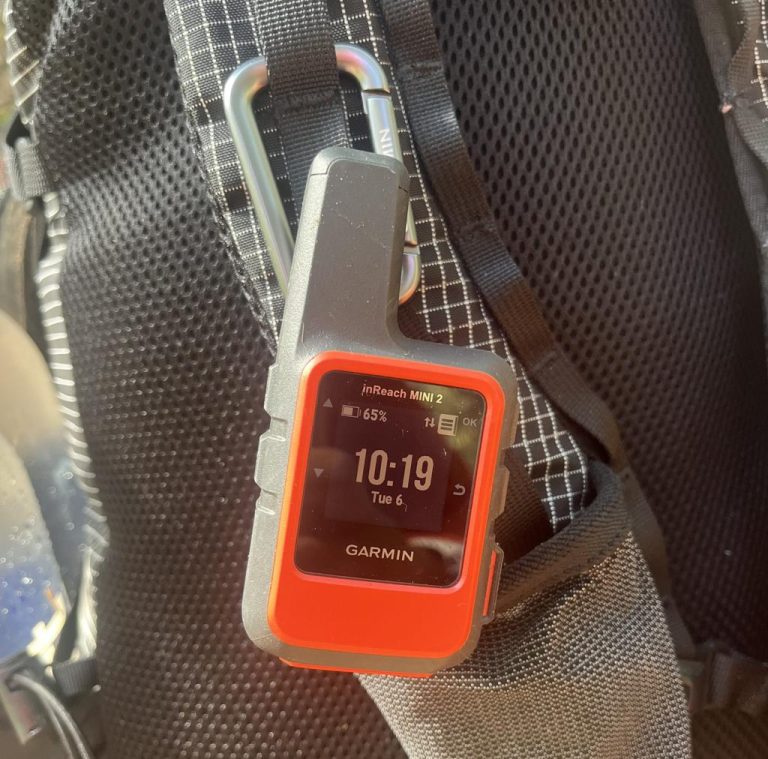
Your phone can die. Your battery bank can get wet. Your GPS app can lose the map tiles you forgot to download. Your screen can crack. Your inReach or watch can run out of power. And if every piece of your navigation plan depends on a battery, you do not really have a navigation plan. You have a best-case scenario.
That is the heart of this companion piece to our Second Act Backpacking navigation episode. The goal is not to turn you into a land navigation expert overnight. The goal is simple: don’t be helpless if your phone stops working. In the episode, we talked about carrying backup navigation tools, understanding your route before you step off, paying attention to terrain features, and using the STOP method if you realize you are lost.
A basic orienteering compass and a printed topographic map can provide a reliable backup system that does not require cell service, batteries, subscriptions, or a charging cable.
What Is an Orienteering Compass?
For most backpackers, the best beginner compass is a baseplate or orienteering compass. You do not need a military lensatic compass or a complicated sighting compass to get started. A simple, quality baseplate compass from a reputable brand is enough for basic backpacking navigation.
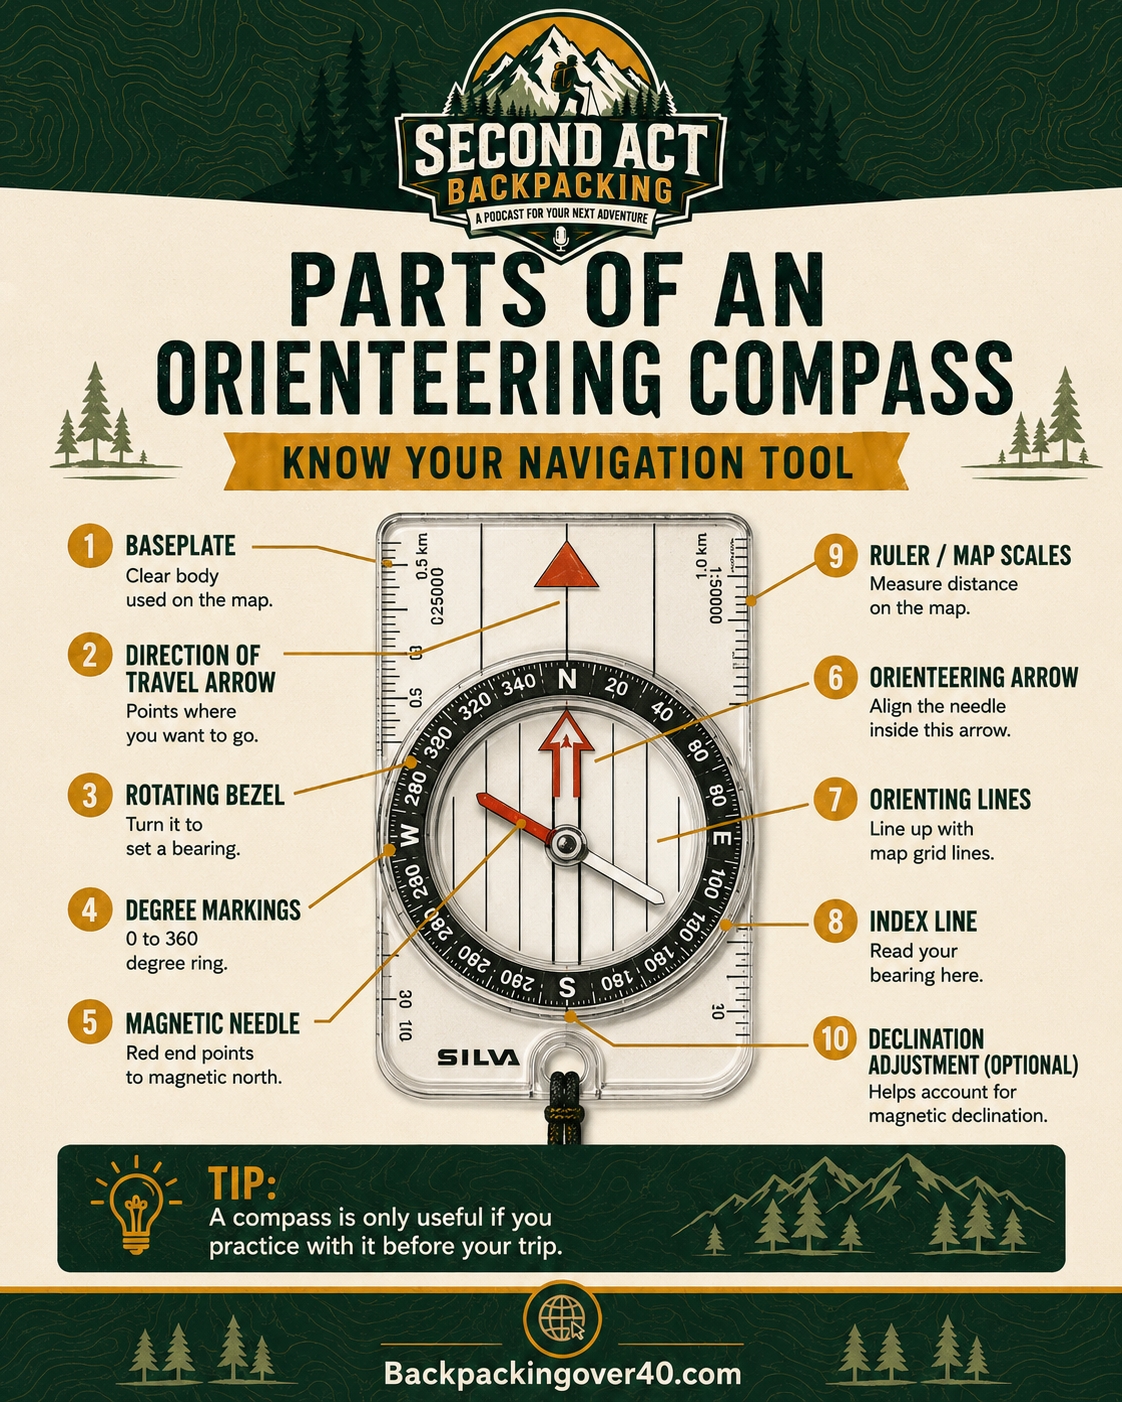
The main parts you need to understand are:
Baseplate
The baseplate is the clear rectangular piece of plastic that holds the compass. Because it is transparent, you can place it directly on a map and still see the map underneath. Most baseplates also have rulers or map scales along the edge.
Direction of Travel Arrow
This is the arrow on the baseplate that points away from you. When you are following a bearing, this is the arrow you point toward where you want to go.
Simple rule: your body follows the direction of travel arrow.
Rotating Bezel
The bezel is the rotating ring around the compass housing. It is marked in degrees from 0 to 360. North is 0 or 360 degrees, east is 90 degrees, south is 180 degrees, and west is 270 degrees.
The bezel lets you set a bearing, which is just a direction expressed in degrees.
Magnetic Needle
The magnetic needle is the moving needle inside the compass housing. The red end usually points toward magnetic north. This is the part of the compass that reacts to Earth’s magnetic field.
Orienteering Arrow
The orienteering arrow is printed on the inside of the compass housing. When you rotate your body and align the magnetic needle with the orienteering arrow, you are aligned with the bearing you set.
You may hear people say, “Put red in the shed.” That means placing the red magnetic needle inside the orienteering arrow.
Orienting Lines
These are the parallel lines inside the compass housing. They are used with the north-south grid lines on a map to help orient the compass and the map together.
REI’s navigation guide covers these same beginner concepts, including compass parts, declination, orienting a map, and using bearings. (REI)
Magnetic North vs. True North
This is where many beginners get intimidated, but the basic concept isn’t hard.
There are two “norths” you need to understand:
True north is the geographic North Pole. This is the north used by most maps.
Magnetic north is where your compass needle points. It is based on Earth’s magnetic field, and it is not the same as true north.
The difference between true north and magnetic north is called magnetic declination. NOAA explains declination as the angle between magnetic north and true north, and that value changes depending on your location and over time. (National Geophysical Data Center)
For backpackers, this matters because your map and compass may not be speaking the exact same language unless you account for declination.
What Is Declination?
Declination is the degree difference between where your compass points and where true north is on the map.
For example, let’s say the declination in your hiking area is 8 degrees west. If you ignore that difference, your route might not be wildly wrong over a short distance, but over a longer distance the error can grow. That is the “compounding error” problem we talked about in the episode. A small directional mistake becomes a bigger location mistake the longer you walk.
This does not mean you need to do advanced math every time you go hiking. It does mean you should know the declination for your area and understand whether your compass can be adjusted for it.
Many modern baseplate compasses allow you to set declination directly. Once adjusted, you can use the compass more naturally because it compensates for the local difference between magnetic north and true north.
For a beginner, the practical rule is this:
Before your trip, look up the current declination for the area where you are hiking, then either set it on your compass or write it on your printed map.
NOAA provides magnetic declination tools and notes that declination is needed to determine true north because compasses point toward magnetic north. (NCEI)
Understanding Topographic Maps
A topographic map is different from a road map. A road map mainly shows roads and places. A topographic map shows the shape of the land.
The most important feature on a topo map is the contour line. USGS explains that contour lines connect points of equal elevation and help show the height, shape, and steepness of terrain. (USGS)
Here is what you need to know as a beginner:
Contour Lines Show Elevation
Each contour line represents a specific elevation. When you move from one contour line to another, you are moving uphill or downhill.
Close Lines Mean Steep Terrain
When contour lines are close together, the terrain is steep. When they are spread apart, the terrain is gentler.
Circles Often Mean Peaks or High Points
Closed contour circles usually show hills, peaks, or knobs. If the numbers increase toward the center, you are looking at a high point.
V-Shapes Often Point Upstream
When contour lines cross a creek or drainage, they often form a V shape. The point of the V usually points uphill or upstream.
Blue Means Water
Streams, creeks, rivers, ponds, and lakes are usually marked in blue.
Green Often Means Vegetation
On many topo maps, green areas indicate heavier vegetation, while lighter areas may suggest more open ground. REI also notes that topo map legends are important because colors, lines, and symbols carry navigational meaning. (REI)
How to Orient a Map
Orienting a map means turning the physical map so it matches the land around you.
If the trail runs north-south on the map, and you orient the map correctly, that trail should also line up north-south in front of you. This makes the map easier to understand because what is on your left in real life is on your left on the map.
A simple way to orient a map:
- Place your compass flat on the map.
- Line the edge of the compass up with the map’s north-south grid lines.
- Rotate the map and compass together until the magnetic needle lines up with north.
- Adjust for declination if your compass requires it.
- Compare the map to the terrain around you.
Once your map is oriented, look around. Does the ridge on the map match the ridge in front of you? Does the creek crossing make sense? Is the trail bending the same direction you expected?
This is where navigation becomes less about gadgets and more about awareness.
What Is a Bearing?
A bearing is simply a direction of travel measured in degrees.
Instead of saying, “walk that way,” a bearing gives you a specific direction, such as 70 degrees or 240 degrees.
Bearings are useful when you need to:
- Walk from one known point to another
- Leave a trail briefly and return to it
- Aim toward a road, ridge, creek, shelter, or trail junction
- Keep yourself from wandering in circles
- Move toward a visible landmark in a controlled way
For backpackers, you do not need to start with complicated off-trail navigation. Start by learning how to take a basic bearing and follow it for a short distance.
How to Take a Bearing from the Field
Let’s say you can see a trail shelter, road gap, mountain, or other landmark and want to walk toward it.
- Hold the compass flat and level.
- Point the direction of travel arrow at the landmark.
- Rotate the bezel until the magnetic needle lines up inside the orienteering arrow.
- Read the degree number at the index line.
- That number is your bearing.
- Keep the needle aligned as you walk.
The trick is not to stare at the compass the whole time. Instead, use the compass to pick something visible along your bearing, such as a tree, rock, or opening in the terrain. Walk to that object. Then repeat the process.
This is called leapfrogging or using intermediate landmarks. It helps you stay on course without walking with your face buried in the compass.
How to Follow a Bearing Over Distance
Following a bearing over a distance is where people often make mistakes. The compass gives you a direction, but the terrain gets a vote.
You may encounter blowdowns, water, cliffs, thick brush, steep slopes, or unsafe footing. Do not blindly follow a bearing into danger.
Instead:
- Set your bearing.
- Pick a visible object along that line.
- Walk to that object.
- Recheck the compass.
- Pick the next object.
- Repeat.
If you have to move around an obstacle, make a deliberate correction. Do not just wander around it and hope you magically return to your line.
For backpackers, this is most useful in short, controlled situations. For example, if you step off trail to use the bathroom, you can take a bearing before leaving the trail, then use the reverse bearing to return.
Using a Reverse Bearing
A reverse bearing points you back the way you came.
To calculate a reverse bearing:
- If your bearing is less than 180 degrees, add 180.
- If your bearing is more than 180 degrees, subtract 180.
Example:
- Outbound bearing: 80 degrees
- Reverse bearing: 260 degrees
Another example:
- Outbound bearing: 240 degrees
- Reverse bearing: 60 degrees
This is a simple skill that can help you avoid the classic mistake of stepping off trail, wandering farther than you intended, and becoming disoriented.
Use Handrails and Catch Features
Beginner navigation gets easier when you use big terrain features.
A handrail is a feature you can follow, like a trail, creek, ridge, road, fence line, or valley. It keeps you oriented because you know you are moving along a major feature.
A catch feature is something obvious that tells you when you have gone far enough or too far. Examples include a road or stream crossing, a major trail junction, a lake, a ridge, or a powerline cut.
Before a hike, look at your route and identify these features:
- Where is the first major trail junction?
- How far is it from the trailhead?
- When should I cross water?
- When should the trail start climbing?
- What road, ridge, or creek would stop me if I overshot my route?
- What major landmark should be visible?
This is the kind of mental map that helps you notice when something is wrong early, before you are truly lost.
Basic Map and Compass Navigation: The Most Important Navigation Skill:
Your best navigation tool is not your phone, your compass, or your map.
It is paying attention.
Look behind you occasionally so you know what the trail looks like in reverse. Notice trail junctions. Pay attention to creek crossings. Watch for ridgelines, gaps, switchbacks, open fields, road crossings, and major climbs.
Ask yourself:
- What was my last known location?
- What should I reach next?
- Am I climbing when I expected to be descending?
- Is the creek on the correct side of the trail?
- Did I miss a turn?
- Does this terrain match the map?
A GPS dot can tell you where it thinks you are. Terrain awareness helps you recognize whether that answer makes sense.
What to Do If You Get Lost: Use STOP
Stop
Stop moving. Take a breath. Sit down if needed. Wandering while anxious usually makes things worse.
Think
Think back to your last known location. When were you last certain you were on the correct trail? What turns did you make? Did you cross water? Did you climb or descend?
Observe
Look around carefully. Check your map, compass, GPS, and surroundings. Look for landmarks, terrain features, trails, water, ridges, roads, or signs of civilization.
Plan
Make a deliberate plan. That might mean retracing your steps safely. It might mean staying put and signaling for help. It might mean moving to a safer or more visible location if conditions require it.
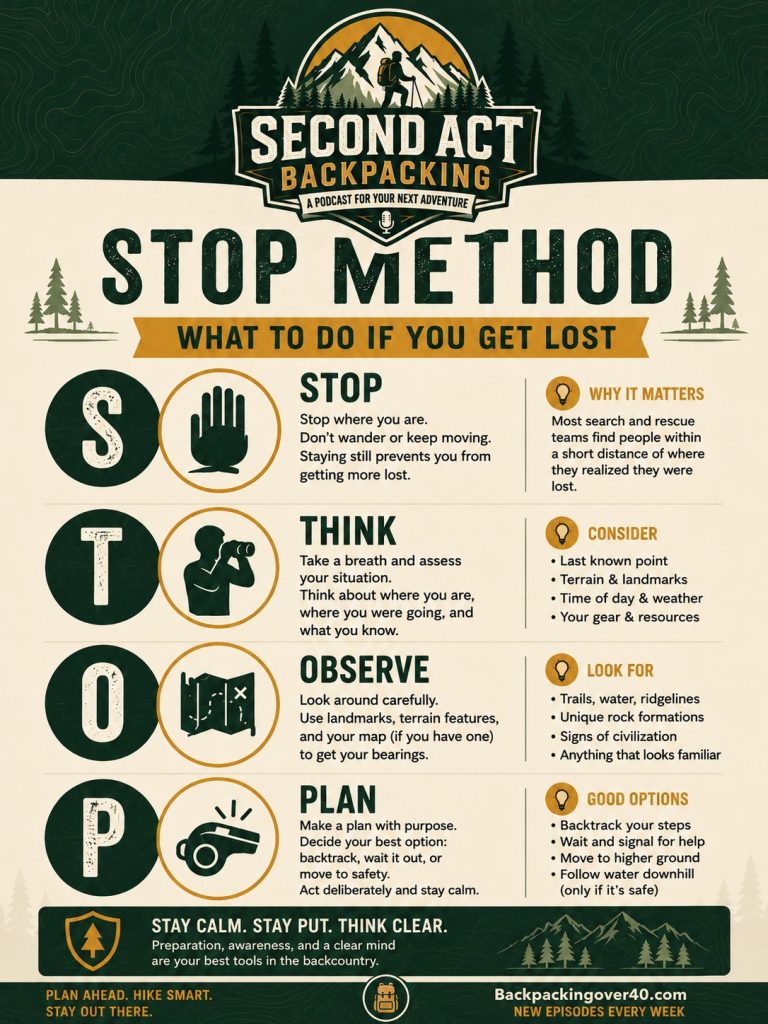
The National Park Service advises lost hikers to stop and breathe, assess the situation, use tools such as a map, compass, GPS, or landmarks to locate themselves, and retrace their steps if it is safe to do so. (National Park Service)
Beginner Practice Drill
Do not wait until you are tired, wet, nervous, and off-trail to learn this.
Practice somewhere safe:
- Go to a local park.
- Bring a baseplate compass and a printed map.
- Identify north.
- Orient the map.
- Pick a visible landmark.
- Take a bearing to it.
- Walk toward it using intermediate landmarks.
- Take a reverse bearing back.
- Compare what you did with the map.
Then practice again.
You do not need to be perfect. You need to be familiar enough with the compass that it’s not a mystery when you need it.
Final Takeaway
Modern GPS tools are excellent. Use them. Download offline maps. Carry a battery bank. Track your route. Mark your trailhead. Use your watch, phone, or satellite messenger.
But do not let convenience replace competence.
A basic compass, a printed topo map, and a few practiced skills can give you a backup plan when electronics fail. You do not need to become an expert navigator before your next backpacking trip. You just need to know enough to stay oriented, recognize when something is wrong, and make calm decisions before a small mistake becomes a serious problem.
For backpackers over 40, especially those returning to the trail after years away, this is not about fear. It is about confidence.
Plan ahead. Pay attention. Carry backups. And if you get turned around, STOP before you make it worse.